Fluid Power Maintenance Engineering
How to Remove a Stuck Hydraulic Cylinder Gland or Cap: The Ultimate Guide
An authoritative and highly comprehensive technical manual detailing thermal shock techniques, specialized extraction tooling, thread locker neutralization, and safe teardown protocols for seized fluid power actuators.

The Toughest Challenge in Fluid Power Restoration
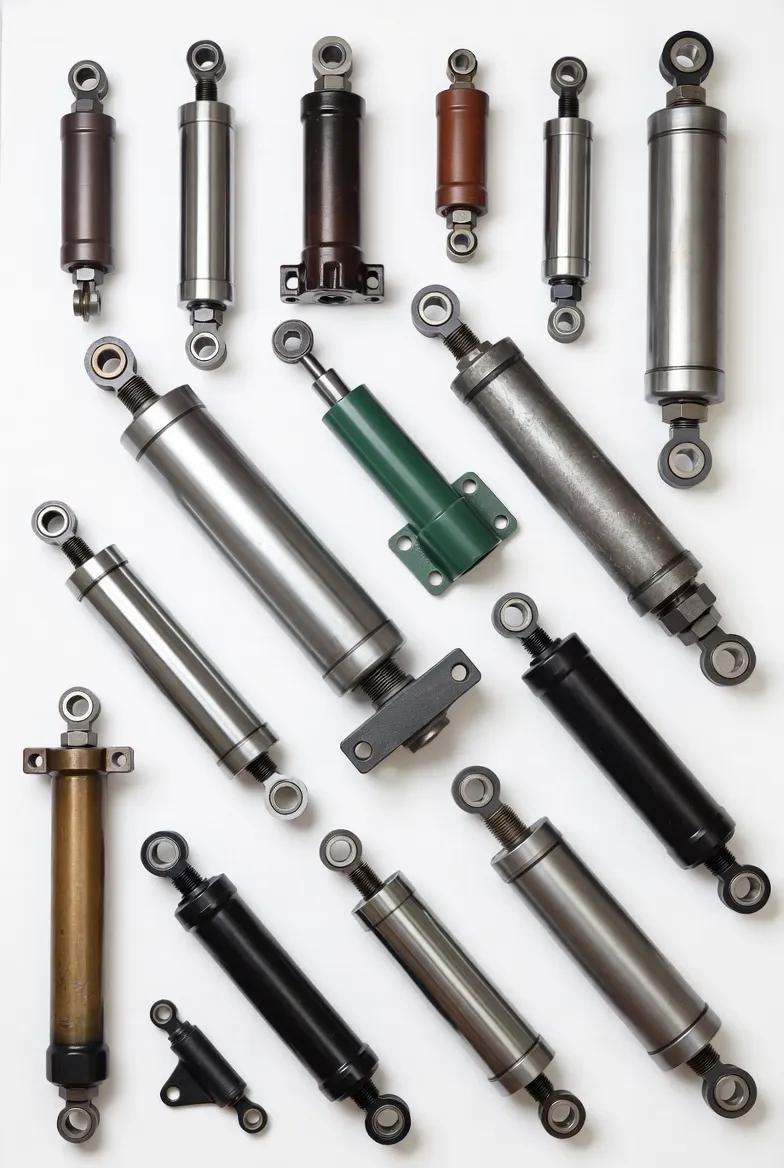
In the rigorous and highly demanding fields of heavy construction, industrial manufacturing, agriculture, and marine engineering, fluid power systems are the undisputed backbone of mechanical force. Hydraulic cylinders are constantly subjected to extreme operational abuses, enduring relentless hydrostatic pressures, abrasive environmental contaminants, violent shock loads, and extreme thermal cycling. Over thousands of operational hours, internal seals degrade, necessitating a complete hydraulic cylinder teardown. However, before a mechanic can replace a single polyurethane U-cup or wiper seal, they must conquer the most notorious and frustrating obstacle in fluid power maintenance: figuring out how to remove a stuck hydraulic cylinder gland or cap.
The cylinder head, commonly referred to as the gland, end cap, or bearing housing, is the heavy steel or ductile iron plug through which the highly polished piston rod protrudes. This component is responsible for sealing the high pressure fluid inside the barrel while simultaneously guiding the rod under immense lateral loads. To withstand these forces, original equipment manufacturers torque these threaded glands to hundreds, sometimes thousands, of foot-pounds. They are frequently coated in high strength anaerobic thread locking compounds to prevent vibration induced loosening. Combine this massive factory torque with years of galvanic corrosion, rust, and microscopic thread galling caused by high pressure expansion, and you are left with a component that seems permanently welded to the cylinder barrel.
From a rigorous engineering perspective evaluated against the strictest industrial safety standards, extracting a seized gland nut requires far more than just brute force. Applying incorrect mechanical leverage or utilizing the wrong tools will instantly deform the cylinder barrel, shatter the gland face, or severely score the chrome piston rod, instantly transforming a standard seal replacement job into a catastrophic, highly expensive complete unit replacement. This authoritative, highly detailed technical manual will comprehensively break down the metallurgy of seized threads, the physics of thermal expansion, specialized extraction tooling, and the precise step by step protocols required to safely and effectively remove a stubbornly stuck hydraulic cylinder cap.
Phase 1: Securing the Actuator and Diagnostic Analysis
You cannot apply massive breakaway torque to a component that is unsecured. Properly mounting the cylinder is the absolute foundation of a safe extraction process, preventing damage to both the technician and the hardware.
Proper Clamping Architecture
A highly common and disastrous mistake made by novice mechanics is clamping the middle of the cylinder barrel directly into a standard bench vise. The walls of a hydraulic tube are relatively thin. Applying lateral crushing force to the center of the barrel will permanently warp the bore out of round. When the piston passes over this warped section during operation, it will instantly blow out the high pressure seals. To secure the actuator, you must utilize a specialized hydraulic cylinder repair bench, a heavy duty chain vise, or V-blocks. You must clamp the cylinder exclusively on its thickest, most reinforced sections: either the heavy steel base weldment, the rear mounting clevis, or the extreme reinforced ends of the tube. Never clamp the hollow midsection.
Identifying the Retaining Mechanism
Before applying any torque, you must visually inspect the cylinder to determine exactly how the gland is retained. Applying rotational force to a gland that is not designed to rotate will destroy the housing. Does the face of the gland have pin holes, spanner slots, or a hex head? If so, it is a threaded gland. Look closely along the outer circumference of the barrel near the gland; is there a small set screw locking the threads in place? This set screw must be removed first. Alternatively, if the gland is completely smooth and recessed inside the barrel, it is likely retained by an internal wire ring or a heavy duty snap ring, which requires a completely different “push to pull” extraction methodology rather than rotational torque.

Phase 2: Chemical Penetration and Thermal Shock
When dealing with a threaded hydraulic cylinder cap that has been subjected to years of outdoor environmental abuse, the threads are often fused together by iron oxide (rust) and galvanic corrosion. Furthermore, manufacturers assemble these components using heavy duty anaerobic thread locking compounds. Attempting to overcome these chemical and mechanical bonds with sheer physical force alone will usually result in broken tools or sheared pins. You must degrade the bonds before applying maximum torque.
Capillary Action and Penetrating Oils
Begin the process by aggressively cleaning the joint where the gland meets the barrel using a wire brush and brake cleaner. Once the joint is exposed, generously apply a high quality industrial penetrating oil. Do not confuse standard lubricating oil with penetrating oil; penetrating fluids possess extremely low viscosity and utilize capillary action to pull themselves deep into the microscopic voids of the seized threads, actively dissolving rust. For heavily seized cylinders, mechanics will often apply penetrating oil repeatedly over a twenty four hour period, allowing the chemistry sufficient time to break down the iron oxide bonds before attempting extraction.
Targeted Thermal Expansion (Heat Application)
If chemical penetration is insufficient, the next escalation is thermal dynamics. Applying heat serves a dual purpose. First, anaerobic thread locking compounds (like red Loctite) are designed to cure into a hard plastic. However, these compounds begin to thermally degrade and liquefy when exposed to temperatures exceeding four hundred degrees Fahrenheit (approx. two hundred degrees Celsius). Second, applying localized heat to the outer cylinder barrel causes the steel to rapidly expand radially. Because the internal gland absorbs heat slower, a microscopic gap is temporarily created between the threads, breaking the rust bond.
Critical Safety Warning: Never heat a closed, assembled cylinder without first cracking the hydraulic ports or removing a valve. Heating trapped hydraulic fluid creates explosive vapor pressure. Utilize an oxy-acetylene torch with a rosebud tip, or preferably an electromagnetic induction heater, to apply rapid, localized heat exclusively to the outer barrel area surrounding the threads. Do not overheat the metal to a glowing red state, as this will permanently destroy the metallurgical tempering and yield strength of the pressure vessel.

Phase 3: Specialized Extraction Tooling and Mechanical Leverage
With the rust bonds degraded and the thread locker neutralized, it is time to apply rotational force. The specific tool utilized depends entirely on the design of the gland face. Using the wrong tool will guarantee component destruction.
Hydraulic Cylinder Spanner Wrenches
If the gland features small, circular holes drilled into its face, you must use an adjustable pin spanner wrench. The hardened steel pins on the wrench must be selected to perfectly match the diameter of the holes in the gland. If the pins are too small, they will immediately shear off under torque. If the gland features square cut notches around its perimeter, you must utilize a hook spanner wrench. Ensure the wrench is seated deeply and squarely into the slots to prevent slipping, which can cause severe injury.
The Danger of Pipe Wrenches
A desperate mechanic will often resort to using a massive pipe wrench on the outer diameter of a smooth gland. This is a highly destructive practice. The aggressive, hardened teeth of a pipe wrench are designed to bite into soft metal. Using them on a hydraulic cylinder gland will create deep, jagged burrs and gouges in the steel. Not only does this ruin the structural integrity of the component, but when you attempt to slide the gland off the piston rod later, those sharp burrs can easily scratch the polished chrome, turning a cheap seal repair into a total rod replacement.
Impact and Cheater Bars
Static torque is often insufficient. To break the static friction of seized threads, you must introduce mechanical shock. While maintaining tension on the spanner wrench with a long steel extension pipe commonly called a cheater bar, strike the handle of the wrench sharply with a heavy brass hammer or dead blow mallet. The sudden kinetic shockwave travels through the steel, violently fracturing the crystallized rust bonds holding the threads hostage. Never use a steel hammer directly on the cylinder components, as it will deform the machined surfaces.
Phase 4: Extracting Internal Wire Rings and Snap Rings
Many modern compact hydraulic cylinders, particularly those utilized in mobile agricultural equipment or steering linkages, do not feature threaded glands. Instead, the gland is perfectly smooth, recessed deep inside the barrel, and retained by a hidden internal wire ring or a heavy duty snap ring. Applying rotational torque to this style of gland is entirely useless. You must execute a “push to pull” methodology.
- ✔️
Pushing the Gland Inward: To expose the retaining ring, the heavy steel gland must actually be driven deeper into the cylinder barrel. Place a specialized steel driving sleeve or a block of dense hardwood against the face of the gland, ensuring you do not touch the chrome rod. Strike the block squarely with a heavy sledgehammer, or utilize a shop press to push the gland inward by approximately half an inch. This action will suddenly reveal the hidden snap ring groove machined into the interior wall of the barrel.
- ✔️
Ring Extraction: Once exposed, utilize heavy duty snap ring pliers or specialized angled picks to compress and extract the retaining ring. This ring is under immense spring tension; wear safety glasses, as it can violently fly out of the groove. Ensure the internal groove is completely free of rust and debris before proceeding.
- ✔️
Popping the Gland Outward: With the mechanical restraint removed, the gland must be pulled outward. However, the internal suction of the piston seals often makes pulling it by hand impossible. To overcome this, mechanics use the fluid power system itself. Reinstall a hydraulic fitting into the base port of the cylinder. Apply a very short, highly controlled burst of low pressure shop compressed air into the base port. The air pressure will push against the main piston, which will slide forward and gently pop the gland assembly smoothly out of the barrel. Keep your hands clear of the gap to avoid pinching.

Phase 5: The Last Resort Methods
In extreme scenarios, particularly with marine or heavy mining equipment that has been submerged in corrosive environments for decades, the threads of the gland may become permanently cold-welded to the barrel. When penetrating oil, thermal shock, and massive impact leverage all fail, engineers must resort to destructive machining extraction.
If the gland absolutely refuses to rotate, a skilled machinist will secure the entire cylinder assembly into a large industrial lathe. Using a specialized cutting tool, they will carefully machine a relief groove directly through the center of the stuck gland face, cutting deep enough to just barely kiss the internal threads of the barrel. This relief cut relieves the extreme radial tension holding the component hostage. The gland can then be collapsed inward on itself using a chisel and easily extracted. While this method guarantees the physical destruction of the original gland requiring a new custom gland to be machined from raw billet stock it successfully saves the far more expensive cylinder barrel and chrome piston rod from being completely scrapped.

Conclusion: Methodical Patience Over Brute Force
Figuring out how to remove a stuck hydraulic cylinder gland/cap is the defining test of a maintenance professional’s patience and technical aptitude. Operating solely on brute force will invariably result in sheared tooling, warped pressure vessels, and catastrophic financial damage. By adhering to uncompromising safety protocols, understanding the chemical breakdown of rust and thread lockers, identifying the exact mechanical retention architecture, and utilizing precision spanner wrenches combined with thermal shock, technicians can successfully extract the most stubbornly seized components. Mastering this critical teardown phase is the absolute prerequisite for executing a flawless hydraulic repair, replacing degraded seals, and returning the world’s heavy machinery to the field with unyielding reliability.