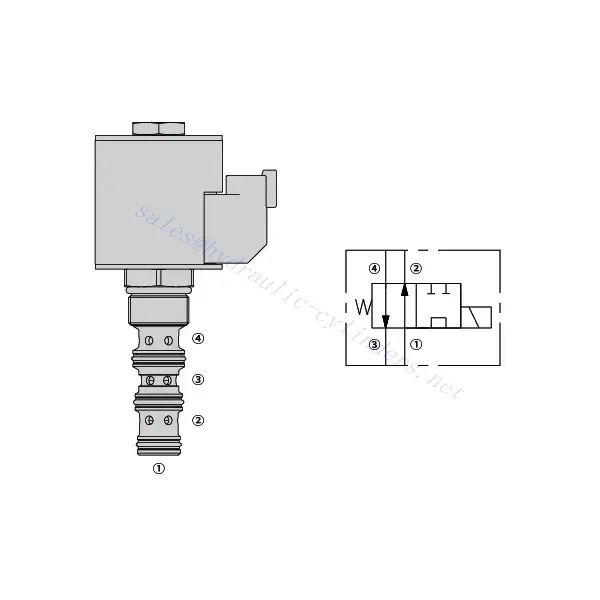
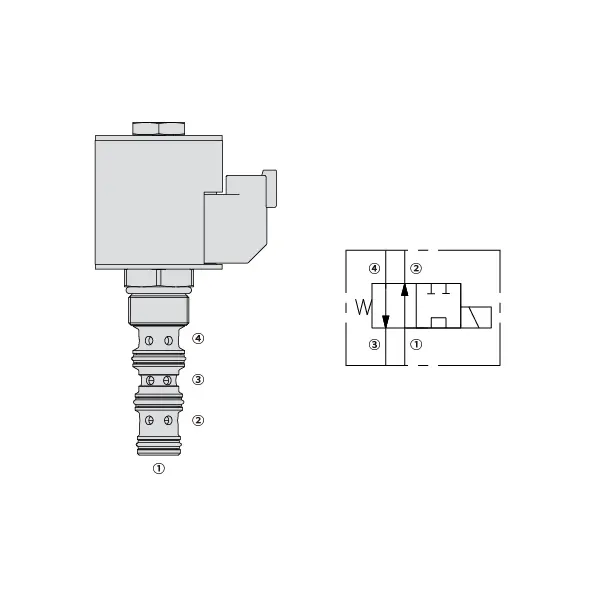
30SD10-44 Solenoid Directional Valve
30SD10-44 Solenoid Directional Valve
The 30SD10-44 solenoid directional valve is a high-performance hydraulic component designed to provide exceptional efficiency and precise control in a wide range of applications. With advanced engineering and cutting-edge technology, this valve allows for seamless directional control of hydraulic fluid, enabling reliable operation in various industries. From industrial machinery to mobile equipment, the 30SD10-44 solenoid directional valve is the trusted solution for optimizing hydraulic systems.
The 30SD10-44 solenoid directional valve offers exceptional efficiency, control, and durability for hydraulic systems. Its precise directional control capabilities, robust construction, and easy installation make it an excellent choice for various applications. By following the recommended maintenance practices, you can ensure optimal performance and extend the lifespan of this valve. Invest in the 30SD10-44 solenoid directional valve today and experience enhanced efficiency and control in your hydraulic systems.
30SD10-44 Solenoid Directional Valve Characteristics:
- Robust Construction: The 30SD10-44 solenoid directional valve is built to withstand demanding environments. Constructed from high-quality materials, it offers exceptional durability and longevity, ensuring reliable performance even in harsh conditions.
- High Flow Capacity: This valve boasts a high flow capacity, enabling efficient and rapid movement of hydraulic fluid. It facilitates quick response times and enhances the overall productivity of hydraulic systems.
- Easy Installation: The 30SD10-44 solenoid directional valve is designed for hassle-free installation. It features standardized connections and mounting options, making integrating your hydraulic system a breeze.
- Versatile Applications: This valve is suitable for various applications across various industries. Whether in manufacturing, construction, or agriculture, the 30SD10-44 solenoid directional valve can be customized to meet your specific hydraulic control needs.
30SD10-44 Solenoid Directional Valve Parameter:
| Rated pressure | 207 bar (3000 psi) | |
| Peak flow | 23 L/min (6 gpm) | |
| Fluid | Mineral-based or synthetics with lubricating properties | |
| Fluid temperature range ℃ | -54 to 107 ℃ (Polyurethane seals) | |
| -40 to 100 ℃ (Buna N seals) | ||
| -26 to 204 ℃ (Fluorocarbon seals) | ||
| Viscosity range | 7.4 to 420 mm2/s | |
| Degree of contamination | The minimum pollution level is ISO4406 level 20/18/14, and level 17/15/13 is recommended to prolong the service life | |
| Internal Leakage | ≤ 82 mL/min@207 bar | |
| Cavity | VC10-4 | |
| Coil Duty Rating | Continuous from 85% to 115% of nominal voltage | |
| Initial Coil Current Draw at 20℃ | E-coil | 1.7A at 12VDC; 0.85A at 24VDC |
| D-coil | 1.67A at 12VDC; 0.83A at 24VDC | |
| Minimum pull-in voltage | 85% of nominal at 207 bar | |
30SD10-44 Solenoid Directional Valve Advantages:
• Continuous-duty rated coil
• Cartridges are voltage interchangeable
• Optional waterproof E-Coils rated up to IP69K
• Efficient wet-armature construction
• Industry common cavity
• Hardened parts for long life
Usage Method Of 30SD10-44 Solenoid Directional Valve:
Using the 30SD10-44 solenoid directional valve is straightforward and user-friendly. Here’s a step-by-step guide to get you started:
- Prepare the System: Ensure the hydraulic system is appropriately set up and all necessary components are in place.
- Mount the Valve: Install the 30SD10-44 solenoid directional valve in the desired location within the hydraulic system and secure it tightly using appropriate mounting brackets or fasteners.
- Connect the Plumbing: Connect the hydraulic lines to the valve’s designated ports. Ensure proper alignment and tighten the connections to prevent leaks.
- Electrical Connections: Connect the solenoid valve to the electrical power supply. Follow the wiring diagram provided with the valve to connect the wires and ensure safe operation correctly.
- Test and Adjust: Once the valve is installed and connected, test its functionality by activating the solenoid and observing the directional control of the hydraulic fluid. Make any necessary adjustments to ensure proper operation.
How To Install A Moen Shower Valve Cartridge?
Installing a Moen shower valve cartridge requires careful attention to detail to ensure proper functioning of your shower system. Here’s a step-by-step guide to help you with the installation process:
- Gather the Required Tools: Before starting, gather the necessary tools, including an adjustable wrench, pliers, screwdriver, and a cartridge puller (if needed).
- Turn Off the Water Supply: Locate the main water shut-off valve for your house and turn it off to stop the water flow to the shower. If you have a dedicated shut-off valve for the shower, you can use that instead.
- Remove the Handle and Trim: Remove the handle by locating the set screw or screw cover on the handle and using a screwdriver or Allen wrench to loosen and remove it. Once the screw is removed, pull the handle off. Next, remove the trim plate or escutcheon surrounding the valve using a screwdriver.
- Take Out the Old Cartridge: Depending on the Moen shower valve model, the cartridge removal method may vary. Some cartridges can be pulled out by hand, while others may require a cartridge puller. If your cartridge is stubborn and won’t come out easily, refer to the manufacturer’s instructions or consult a professional for assistance.
- Prepare the New Cartridge: Before installing the new cartridge, make sure it matches the model and type specified by Moen for your shower valve. Follow any included instructions or guidelines provided with the cartridge.
- Install the New Cartridge: Insert the new cartridge into the valve body, aligning it properly. Push it firmly but gently until it is fully seated in the valve. Ensure that it is correctly aligned with any tabs or grooves in the valve body.
- Reassemble the Trim and Handle: Replace the trim plate or escutcheon over the valve and secure it with screws. Then, slide the handle back onto the valve stem and tighten the set screw or screw cover to secure it in place.
- Turn On the Water Supply: Once the cartridge and handle are securely in place, turn on the main water supply or dedicated shower shut-off valve to restore the water flow to the shower.
- Test the Functionality: Turn on the shower to test the new cartridge’s functionality. Check for any leaks, unusual noises, or issues with water flow and temperature. Make any necessary adjustments to ensure smooth operation.
工厂的能力和产能:
(1) 装配
我们拥有一流的自主研发装配平台。液压油缸生产车间拥有 4 条半自动提升油缸装配线和 1 条全自动倾斜油缸装配线,设计年生产能力 100 万支。特种油缸车间配备了各种规格的半自动清洗装配系统,设计年生产能力 20 万只,并配备了知名数控加工设备、加工中心、高精度油缸加工专用设备、机器人焊接机、自动清洗机、油缸自动装配机、自动喷漆生产线等。现有关键设备 300 多台(套)。设备资源的优化配置和高效利用,保证了产品的精度要求,满足了产品的高质量需求。


(2) 机加工
加工车间配备了定制的斜轨车削中心、加工中心、高速珩磨机、焊接机器人及其他相关设备,可加工最大内径 400 毫米、最大长度 6 米的气缸管。

(3) 焊接

(4) 油漆和涂料
配备中小型圆筒自动水性漆喷涂线,实现机器人自动上下料和自动喷涂,设计产能为每班 4000 件;
我们还拥有一条由动力链驱动的大型油缸半自动喷漆生产线,设计产能为每班 60 箱。


(5) 测试
我们拥有一流的检验设施和试验台,确保气缸的性能符合要求。

We are one of the best hydraulic cylinder manufacturers. We can offer comprehensive hydraulic cylinders. We also provide corresponding 农用齿轮箱. We have exported our products to clients worldwide and earned a good reputation because of our superior product quality and after-sales service. We welcome customers at home and abroad to contact us to negotiate business, exchange information, and 与我们合作!
参观我们的 VR 工厂
通过以下方式参观我们的 VR 工厂
液压缸应用:


